TL;DR:
- Non-technical founders can create prototypes using no-code tools like Figma or Marvel.
- Clear goals, user flow, and core features are essential before prototyping.
- Sharing rough prototypes early yields more honest feedback and leads to better products.
You have a SaaS idea that feels genuinely valuable. You can describe it clearly, you know who needs it, and you're ready to move. But then comes the gap: how do you turn that napkin sketch into something real people can actually click through? For non-technical founders, this gap feels like a wall. The good news is that app prototyping has never been more accessible. You don't need a developer, a design degree, or a six-figure budget to build a clickable prototype that investors and users can react to. This guide walks you through every step, in plain language, so you can move from idea to testable product without getting stuck.
Table of Contents
- What you need before you start prototyping
- Choosing the right prototyping tools and platforms
- Step by step guide: app prototyping workflow
- Testing, iterating, and validating your prototype
- Our take: what most founder guides miss about prototyping
- Need help turning your prototype into reality?
- Frequently asked questions
Key Takeaways
| Point | Details |
|---|---|
| Start with clear goals | Define your core app problem and basic user flow on paper before tools or design. |
| Choose accessible tools | Pick prototyping platforms that require no coding and enable quick user feedback. |
| Follow structured steps | Move from sketches to interactive links, then test as soon as possible with actual users. |
| Iterate quickly on feedback | Tweak your prototype based on real user input instead of aiming for perfection up front. |
| Focus on learning, not polish | Basic, shareable prototypes attract the most valuable feedback and validate ideas fastest. |
What you need before you start prototyping
Before diving into specific prototyping steps, you need to lay out your groundwork. Skipping this phase is the single most common reason prototypes fall apart before they deliver any value. Failing to define clear goals and basic user flow is a top reason prototypes fail to deliver value for SaaS founders. Think of it like planning a road trip: you need a destination and a rough route before you fill the tank.
Here's what you need to have in place before you open any tool:
- A clear problem statement. One or two sentences that explain exactly what pain your app solves and for whom.
- A basic user journey map. A simple sequence showing how a user moves from opening your app to completing their main goal.
- A prioritized feature list. Three to five core features that directly address the problem, ranked by importance.
- Basic competitor awareness. Know what already exists so your prototype isn't accidentally a copy of something users already have.
Not everything needs to be elaborate. A whiteboard sketch or a simple bulleted doc is enough.
| Requirement | Must-have | Nice-to-have |
|---|---|---|
| Problem statement | Yes | |
| User journey map | Yes | |
| Prioritized feature list | Yes | |
| User personas | Yes | |
| Competitor analysis | Yes | |
| Wireframes | Yes | |
| Brand guidelines | Yes |
The must-haves keep your prototype focused. The nice-to-haves become more relevant once you've validated your core idea. If you try to build everything at once, you'll spend three weeks on details that might be thrown out after your first user test. Professional UI/UX services can help if you want structured guidance on user research, but most early-stage founders can handle this phase with sticky notes and a Google Doc.
Pro Tip: Document each requirement visually. A quick sketch or a simple flowchart is worth ten pages of written notes. Visuals keep everyone aligned and reduce the chance of misunderstanding when you start building.
Choosing the right prototyping tools and platforms
With your prep work done, now focus on selecting the best prototyping tools for your needs. The market here is genuinely crowded, but that's actually good news. Modern prototyping platforms now allow for interactive app prototypes with no coding required, which means you're not locked out of the process just because you don't write code.
Here's a comparison of the most popular tools for non-technical SaaS founders:
| Tool | Free tier | Learning curve | Export options | Best for |
|---|---|---|---|---|
| Figma | Yes | Low | PDF, PNG, links | Full-featured design and prototyping |
| Marvel | Yes | Very low | Shareable links | Fast clickable demos |
| InVision | Limited | Low | PDF, links | Team collaboration |
| Sketch | No | Medium | PDF, PNG | Mac users with design experience |
For most non-technical founders, Figma or Marvel is the right starting point. They're both free to start, have drag-and-drop interfaces, and let you share prototypes with a link so testers can click through on any device.
When evaluating any tool, look for these features:
- Drag-and-drop interface so you can build screens without writing a single line of code
- Easy sharing so testers can access your prototype from a browser or phone without installing anything
- Feedback collection so comments and suggestions come back to you in an organized way
- Template libraries to give you a head start on common SaaS screen patterns
If you want to speed up SaaS development and avoid the usual bottlenecks, your tool choice matters less than your workflow. A basic prototype built fast in Marvel beats a perfect one that took three weeks in Sketch.
For presenting your prototype to investors, consider using 3D device mockups to make your screens look polished and credible without hiring a designer.
Pro Tip: Start with the free tier of any tool. Only upgrade when you genuinely hit a wall, not because a paid plan looks impressive. Most founders never need to upgrade during the prototyping phase.
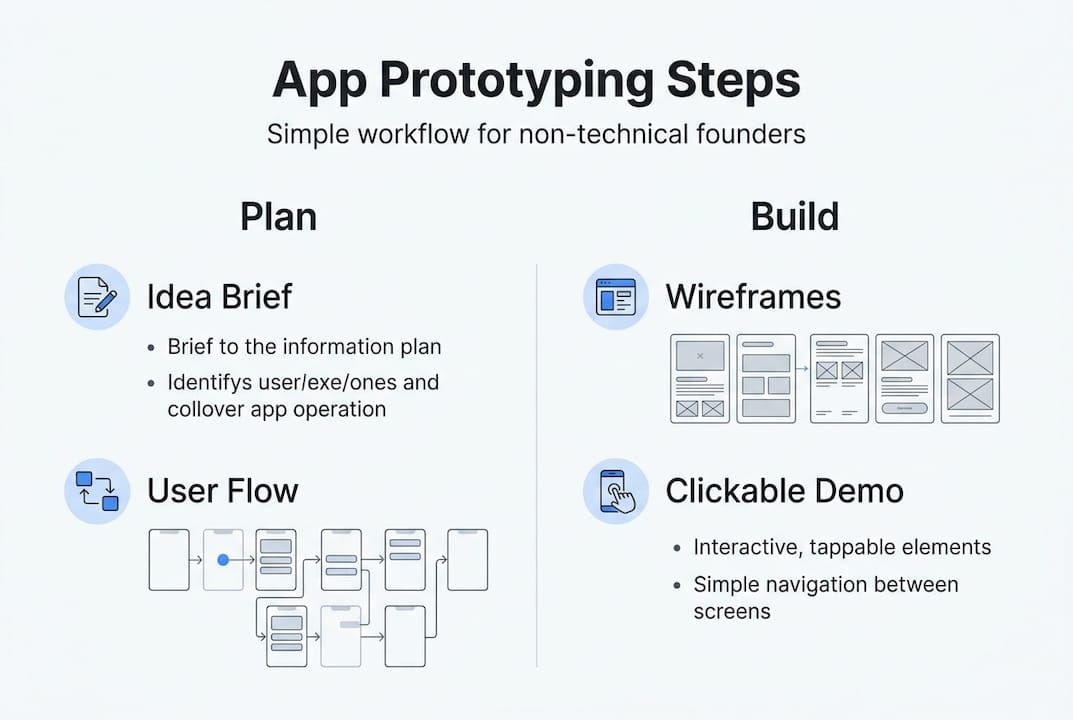
Step by step guide: app prototyping workflow
Now let's get hands-on and follow the actual prototyping workflow, broken into actionable steps. Following a sequential prototyping workflow minimizes confusion and wasted cycles for non-technical teams. Each step builds on the last, so don't skip ahead.
-
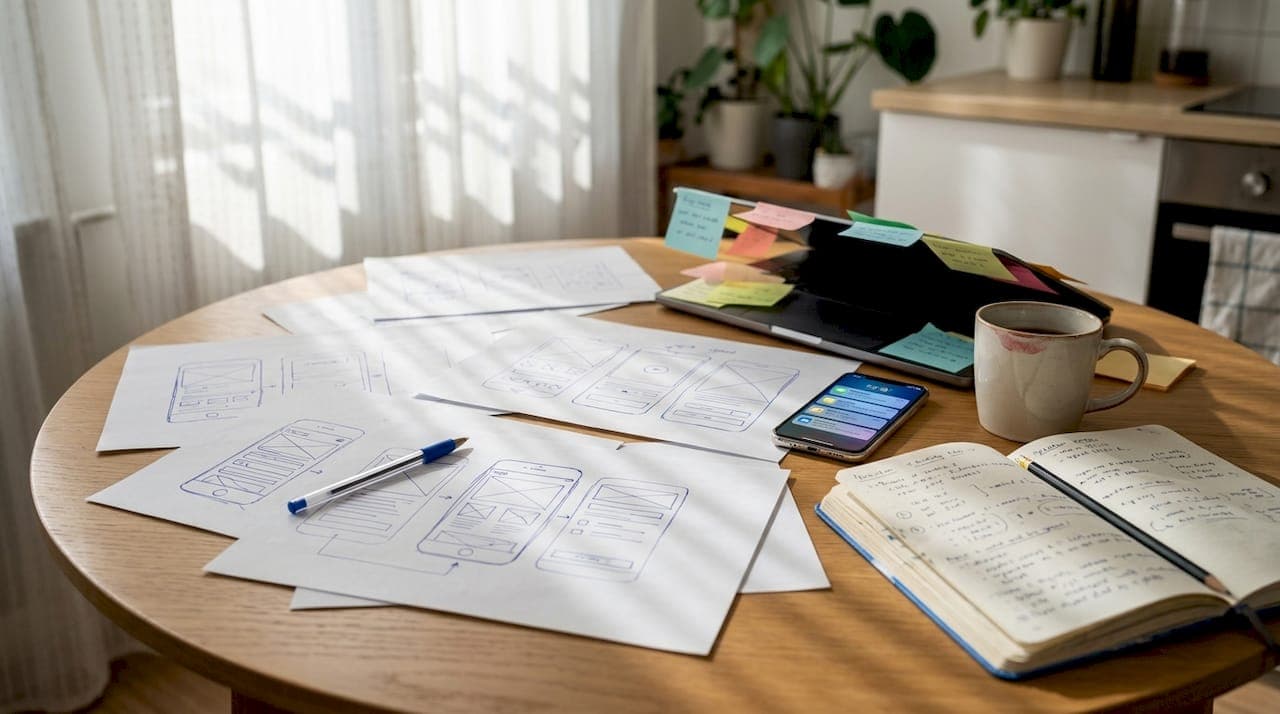
Sketch your main screens. Start on paper or a whiteboard. Draw the five to seven screens a user will see most often. Don't worry about fonts or colors. Focus on layout and content placement. This is your blueprint.
-
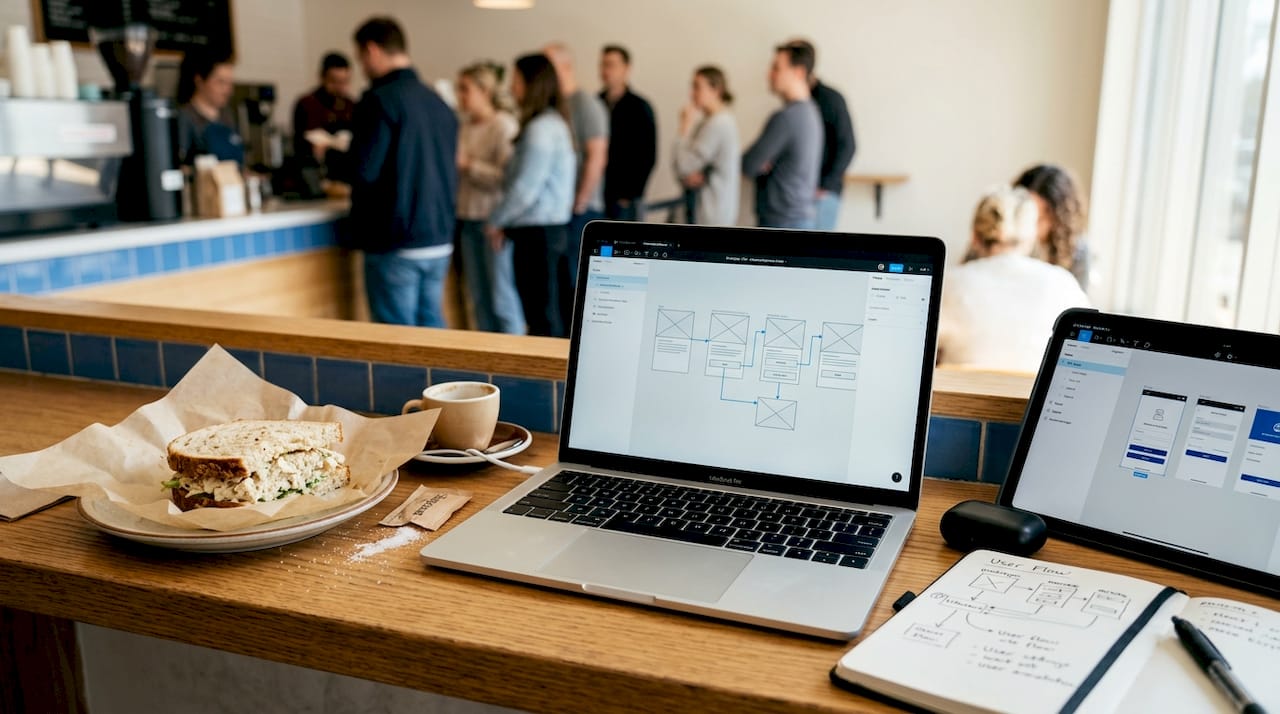
Digitize your sketches. Open your chosen tool and recreate your sketches as simple digital frames. Use placeholder text and basic shapes. Speed matters more than beauty at this stage.
-
Link your user flows. Connect screens so a user can click a button and land on the next logical screen. This is what turns a static design into an interactive prototype. Most tools make this as simple as drawing an arrow.
-
Add minimal interactivity. Include dropdowns, form fields, and basic hover states where they matter for the core flow. Don't animate everything. Just make the critical path feel real.
-
Share with testers. Send the link to five to ten real potential users. Ask them to complete the main task without any guidance from you. Watch where they get confused.
"Over-perfecting at this stage delays real feedback. Launch ugly, then improve."
This workflow aligns directly with solid app development steps and mirrors the MVP validation best practices that actually work in practice. To cut down on manual work during testing, tools that let you generate screenshots fast can save real time when preparing materials for user sessions.
Pro Tip: Set a two-day limit for each step. Constraints force decisions. Analysis paralysis is the silent killer of SaaS prototypes, and a hard time cap is the simplest way to fight it.
Testing, iterating, and validating your prototype
After building your prototype, it's time to test, learn, and adjust fast. This is the phase most founders undervalue. They build a prototype, show it to three friends who say it looks great, and move straight to development. That's expensive and avoidable.
Direct user feedback is the fastest way to uncover usability issues, and investors expect clear validation data before funding. Here are the three most effective ways to get actionable feedback:
- Simple surveys. A five-question form sent after a tester uses your prototype. Ask what confused them, what they expected, and what they'd pay for it.
- Direct observation. Sit with one user (in person or via video call) and watch them navigate your prototype. Don't explain anything. Just observe.
- One-question interviews. After a session, ask: "What was the hardest part?" One focused question gets more honest answers than a long questionnaire.
Once feedback comes in, the goal is rapid iteration, not a full rebuild. Here's the difference:
| Rapid iteration | Slow full-rebuild mistake |
|---|---|
| Change one screen at a time | Redesign the entire prototype |
| Test the same flow again | Start user testing over from scratch |
| Fix only what users couldn't complete | Add new features based on assumptions |
| Keep a changelog of changes | Make undocumented changes |
You should also address UX (user experience) issues early. A prototype with confusing navigation is a preview of a product users will abandon. If multiple testers get stuck at the same point, fix it before moving forward. Studying UX tips for founders gives you a practical frame for interpreting what you observe. And reading up on how to avoid MVP pitfalls will save you from the traps most founders hit at this exact stage. For additional resources on how app previews affect conversions, it's worth understanding what users expect before they even engage.
Our take: what most founder guides miss about prototyping
Every guide tells you which tool to use. Very few tell you the uncomfortable truth: the tool is almost irrelevant. What actually determines whether a prototype helps you or hurts you is how fast you put it in front of real strangers.
In practice, working with non-technical founders reveals a consistent pattern. The ones who build clean, polished prototypes and share them only with their inner circle get filtered, optimistic feedback. The ones who share rough, embarrassingly basic prototypes with actual target users get brutal, honest, useful data. The second group ships better products.
Most guides push founders toward perfection before exposure. That's backwards. A rough prototype shared publicly on a relevant forum or community group generates more real signal in 48 hours than a polished one shown privately for two weeks.
"Launching a 'rough draft' prototype is often the best investment a non-technical founder can make."
The practical takeaway: build the minimum version you're slightly embarrassed to share, then share it immediately. Use the feedback to make your next version smarter, not just prettier. Learning from real MVP lessons shows this pattern holds across industries and product types. Invest in feedback loops, not in pixel-perfect screens that haven't been tested.
Need help turning your prototype into reality?
You've validated your prototype. Users gave you real feedback. Now you need someone to actually build the thing, fast and without the typical agency runaround.
At hanadkubat.com, Hanad works directly with non-technical founders to take validated prototypes and ship production-ready SaaS MVPs in 4 to 12 weeks. No project managers in the middle, no bloated team billing you for meetings. You talk to the person writing the code. The approach draws on Fortune 500 engineering experience at BMW, Deutsche Bahn, and IBM, applied at startup speed. If you're ready to move from prototype to shipped product, reach out for a free consultation and find out what a focused build actually looks like.
Frequently asked questions
What is the simplest way to start app prototyping if I can't code?
No-code platforms let non-technical founders prototype rapidly. Use tools like Figma or Marvel to create clickable demos without writing a single line of code.
How long should app prototyping take for a first MVP?
A basic prototype can usually be built in one to two weeks with the right preparation and tools. Step-by-step workflows speed up MVP delivery time significantly when followed consistently.
How do I know if my app prototype is ready for user testing?
Your prototype is ready when users can complete the main app flow without you explaining anything. User feedback validation is essential before moving to development.
What mistakes do non-technical founders make with prototypes?
Common mistakes include over-detailing features, skipping user feedback, and not limiting prototype scope. Avoid over-engineering and gather real user feedback as early as possible.
Recommended
- Product development best practices for non-technical founders | HK
- Startup product development steps: your guide to fast MVP launch | HK
- Role of UX in MVP: A guide for non-technical founders | HK
- Build your MVP fast without coding: 2026 founder guide | HK
- 5 key advantages of mockup tools for app store success – AppScreenKit